Tart


Deprecated: preg_replace(): Passing null to parameter #3 ($subject) of type array|string is deprecated in /home1/suearon/public_html/wp-includes/kses.php on line 1745

Tarte au citron: Lemon tart recipe

For my annual festive lunch this year,  I made a large lemon tart.  Tarte au citron definitely ranks up there as one of my all time favourite desserts.  I adore lemons and use them prodigiously in my everyday cooking….thinly sliced in salads, lemon and oil as a salad dressed, squeezed liberally into smoked trout pate, hummous or baba ganoush.  As part of a tingling morning drink mixed with orange juice.   If you can get hold of Amalfi lemons they are wonderful – try  Natoora or a specialist greengrocers.  If not try and use unwaxed lemons from a supermarket – better flavour and the zest tastes amazing!

It’s fear of pastry that puts most people off making any kind of tart.  Pastry is really not that difficult – it takes some practice and you have to follow some basic rules such as using cold butter, resting the dough in the fridge for at least an hour before using, handling the pastry as little as possible and a very particular method of putting the pastry into the tart case which I learned when I was an apprentice cook at Stevie Parle’s Dock Kitchen.  This method of blind baking does not require the faff of baking beans or suchlike.  Over the past year my pastry skills have improved so much so that I was really quite proud of the edge of the pastry.

Serves 12-14 people

FOR THE PASTRY

350g plain flour
a pinch of salt
175g unsalted butter (cold), cut into cubes
100g icing sugar
3 egg yolks

FOR THE FILLING

finely grated zest and juice of 7 lemons
350g caster sugar
6 whole eggs
9 egg yolks
300g unsalted butter, softened

Pre heat the oven to 160ºC/325ºF/Gas 4

For the sweet pastry, pulse the flour, salt and butter in a food processor until the mixture resembles coarse breadcrumbs.  Add the icing sugar followed by the eggs yolks and pulse.  The mixture will immediately leave the sides of the bowl and combine.  Spread out a 30 cm piece of cling film on a surface, remove the pastry, bringing it together with the help of the cling film and chill in the fridge for at least one hour.

Coarsely grate (yes grate!) the pastry into a 30cm (12 inch) loose bottomed fluted tin, pressing it quickly, evenly and firmly onto the sides and base.  Try not to work the pastry too much.  Put the tart shell in the freezer for 15 minutes until hard, then bake in the oven for about 15 mins or until pale brown and firm to the touch.  (NB try not to over cook the shell as it will require further baking when filled).  Let the case cool off for 15 mins while you make the filling.

Put all the ingredients except the butter in a large saucepan over a very low heat, and whisk until the eggs have broken up and the sugar has dissolved. I recommend whisking the whole eggs in a little bowl with a fork before adding to the lemon juice, zest and sugar.  It will then be easier to amalgamate the 9 eggs yolks.

Add half the butter and continue to whisk.  At this point the eggs will start to cook and the mixture should coat the back of a metal spoon.  Add the remaining butter and continue stirring until the mixture becomes very thick.  It is important to continue whisking throughout the cooking process to prevent the mixture from curdling.  Remove from the heat, place on a cold surface (this stops the cooking process) and continue to whisk until the mixture is lukewarm.

Raise the oven temperature to 230ºC/450ºF/Gas 8

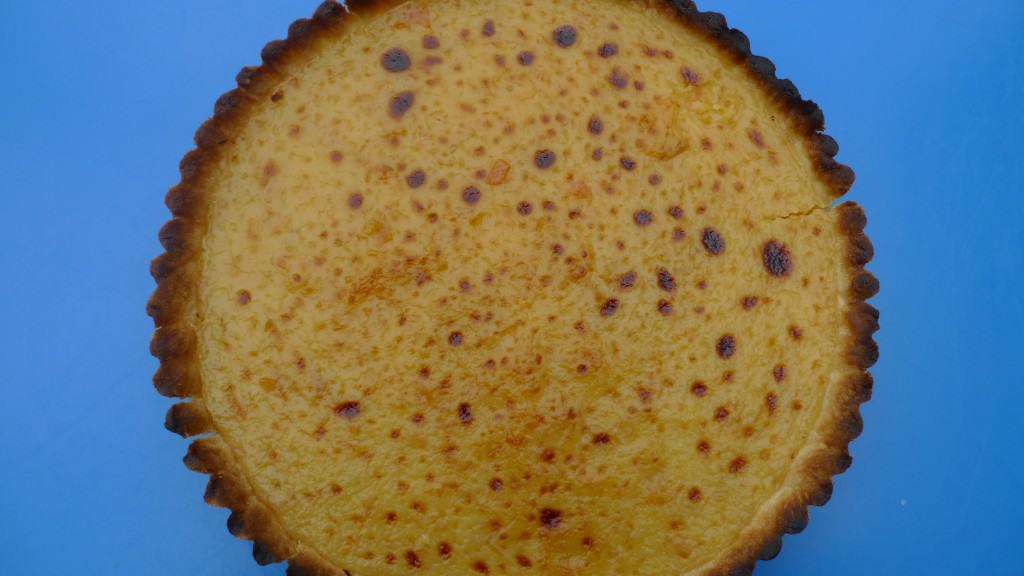
Spoon the lemon filling into the pastry case and bake until the top is brown.  This should take about 8-10 mins.  If like me, you like little brown spots on your lemon tart –  place the tart under an oven grill keeping a wary eye lest it should burn.  My grill is quite fierce so turning the tin helps an even browning. If you do find that your pastry edges are burning – cut a thin long length of foil and apply to the edge of the tart to protect it while it is under the grill.

Remove from the oven and allow it to cool before slicing.
Serve with crème fraiche or solo with an artfully placed splash of fruit couli next to each slice.
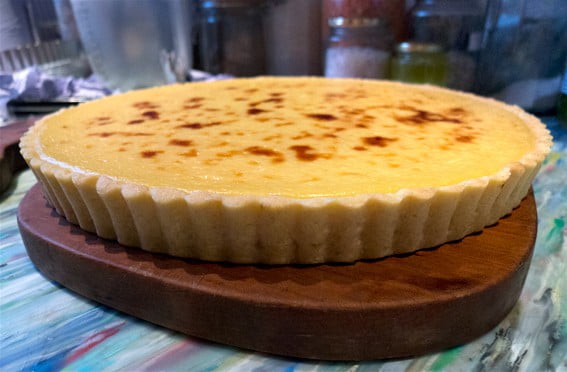
photograph: Mad Dog TV Dinners

Note:  9 egg yolks means nine lots of egg whites.  You can make coconut chocolate macaroons (David Lebovitz has a great recipe!) or financiers with the leftover egg whites. Egg whites can be also be frozen very successfully in small freezer bags though make sure to label with the number of whites before freezing.

Tarte au citron: Lemon tart recipe Read More »

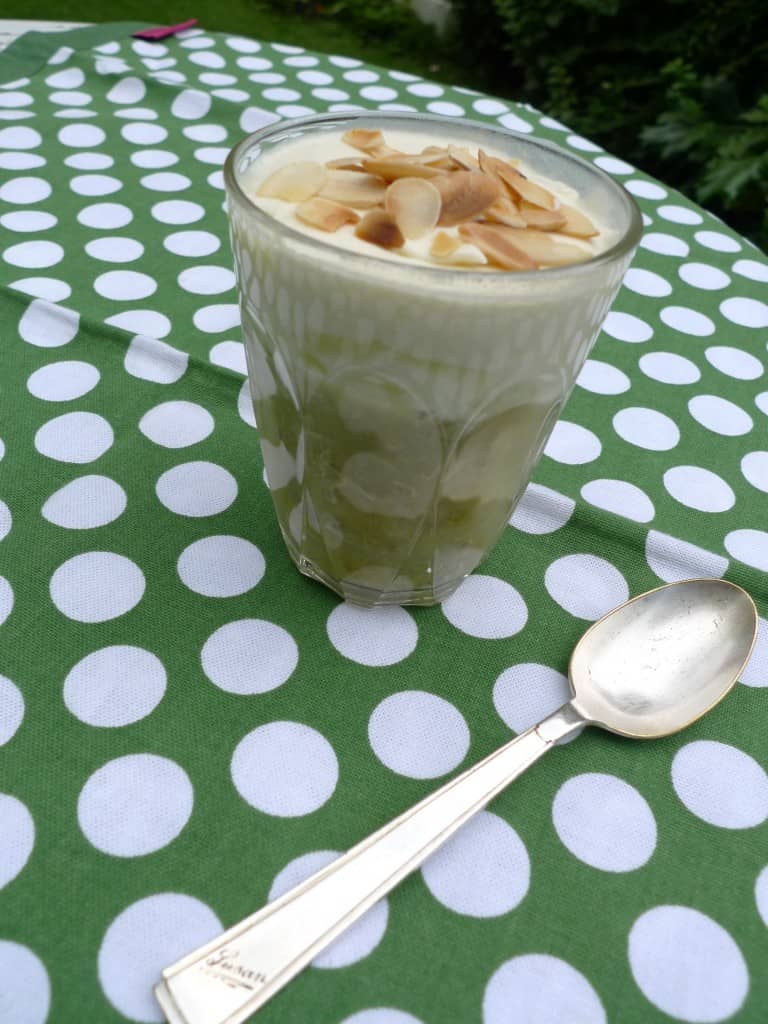
Gooseberry and Elderflower Syllabub

I love tart English fruit.  Rhubarb, Redcurrants, Damsons and through the summer when most of our summer berries are red – along come gooseberries. Lovely pale green, sometimes golden or red flecked,  hairy  goosegogs appear in our shops in from June to August. Evocative of 50s childhood puddings and making a comeback – gooseberry fool, crumble, pie, tart and not forgetting   gooseberry jam and jelly.  Gooseberry Sauce was traditionally eaten with mackerel and other oily fish.   There is still an annual Gooseberry Show at Egton Bridge in North Yorkshire on the first Tuesday in August where the grower with the largest gooseberry wins.

I found this delightful recipe on James Ramsden’s Small Adventures in Cooking site.  Guest posted by Evie of saffron-strands.blogspot.com. I’ve adapted it and reduced the amount of sugar as I prefer a slighter tarter tasting  syllabub.  Gooseberries are really easy to prepare and require very little cooking.  The base for most gooseberry dishes call for the fruit to be stewed and sweetened according to the sharpness of the fruit.

Ingredients
100ml Sauternes or Muscat wine
finely grated zest of a lime
35g caster sugar
300ml double cream
600g gooseberries
80-100g caster sugar, adjust according to taste
2 tbsp elderflower cordial, homemade or shop bought is fine
50g blanched almonds, lightly toasted in the oven

Mix the first three ingredients together in a small bowl and allow to stand for a couple of hours or overnight so that the flavours are well blended.

Wash and top and tail the gooseberries.  Slowly dissolve 80 -100g caster sugar together with the elderflower cordial in a heavy bottomed pan.  Add the gooseberries and cook gently until the fruit is soft but not collapsed – approx 10/15 mins.  Leave to cool completely then place in the fridge.

Whip the double cream until at very soft peak stage and then slowly mix in the sweet wine, lime zest and sugar mixture until it is all incorporated – take care not to over beat the cream mixture!  If it seems too loose don’t fret as it will stiffen once it is chilled.  Spoon the gooseberry mixture into individual serving glasses, half filling the glass and top with the syllabub.  Refrigerate for at least 2 hours – it will keep in the fridge for at least 24 hrs and when ready to serve, finish off by sprinkling with the toasted almonds.  Watch it disappear!

Serves 4-6 depending on the size of glass used.

More gooseberry recipes and further reading for gooseberry fans:

Jane Grigson’s classic Fruit Book – (Penguin Cookery Library)  beautifully written section about the gooseberry with some traditional recipes.
Hugh Fearnley-Whittingstall’s Gooseberry Recipe’s from The Guardian’s Life&Style
RHS Grow your Own Gooseberries: Essential information for those wanting to grow their own gooseberries.

Gooseberry and Elderflower Syllabub Read More »

Pudding of the Month: October 2011

Fig and Frangipane Tart

As I had four ripe figs, some leftover pastry and some frangipane mixture.  I decided to make these three small tarts for an autumn picnic in Kew Gardens last week.  Sadly, I don’t have a fig tree in my garden but as figs are plentiful this time of use I was spoilt for choice.  I used a Turkish variety called Black Bursa.  You can pick figs up for as little as 37p each right now.  I go for the plump black ones bursting with a sweet jammy texture and rich flavour.  Once bought they must be consumed quickly as they don’t keep well.

This recipe is for two medium size tarts or one large one but you can easily adapt it to make smaller tarts like mine.  I used three, 10cm loose-bottomed fluted flan tins.

for the pastry
350g plain flour
a pinch of salt
175g unsalted butter
100g icing sugar
3 egg yolks

for the filling
250g unsalted butter, room temperature
250g caster sugar
3 eggs lightly beaten
250 g ground almonds
50g plain flour
12-14 figs, stems trimmed, cut lengthways in 1/4s or 1/8s according to their size

Start with pastry as it needs to rest for at least one hour while you make the filling.  In a food processor pulse the flour, salt, butter and sugar until the mixture looks like fine breadcrumbs.  Add the egg yolks and pulse a little more until just combined.  Bring together quickly on a cold work surface, wrap in cling film and chill for at least an hour.  If you have any pastry left once you’ve made your tart,  it will keep well in the fridge for a couple of days.  It also freezes very well too.

Pre-heat the oven to 180ºC/350ºF/gas mark 4.  Coarsely grate the pastry into a 25cm loose-bottomed fluted flan tin, pressing it well into the sides and base. Try not to over work the pastry too much.  Put the tart shell in the freezer for 15mins, then blind bake for about 15 mins until firm and slightly golden.  Put tart shell aside to cool.  Turn the oven down to 150ºC/300ºF/gas mark 3.

For the filling, cream the butter and sugar in a food processor until light and fluffy.  Add the eggs one at a time mixing well after each one.  In a separate bowl combine the ground almonds with the flour.  Add the ground almonds to the butter mixture and mix well.

Spread the almond paste over the base of the tart shell/s.  Arrange your figs artfully, pressing them lightly, bottoms down,  into the almond paste.  If you are making one large tart then place them in concentric circles with their cut sides facing upwards.  Bake for about 60 mins or until firm and golden.  You can dust with a little icing sugar if you like and serve warm or cold.  Serve with a spoonfull of Greek yogourt or better still Turkish yogourt!

Enjoy this very autumnal delight!


Pudding of the Month: October 2011 Read More »

Tarte Tatin

This delicious pastry made with apples established the reputation of the Tatin sisters who ran a hotel in the Loire Valley in 1898.  According to tradition the sister who did the cooking, Stephanie, was making a traditional apple pie and  over-cooked the apples.  She rescued the dish by putting a pastry cover on top of the apples and quickly finishing it off in the oven. She inverted the cooked tart onto a plate and to her delight the hotel guests loved it.  According to tradition the dish became so popular that the owner of Maxim’s in Paris sent down spies to discover the secret recipe.

The other day my friend Laurent, former pastry chef turned yoga teacher (yogalaurent), came over to make tarte tatin with me.  A few days before he’d texted me a list of ingredients reminding me to get firm dessert apples (eg Braeburn, Jonagold) which would hold their shape and not turn to mush!  He also checked that I had a heavy ovenproof frying pan.  On a recent day trip to Paris, I bought two different sized black iron pans which were perfect for tarte tatin.  Black iron pans are used all the time in restaurants –  you can start a dish on the stove and  put the pan staight into a very hot oven to finish it off.  I love mine but you do have to temper them before use and always smear a little oil over the surface after cleaning them or they’ll end up rusty!!

As we had limited time, we used a good quality buttery ready-made puff pastry.  Working together we decided to use two pans and divide the recipe according to the size of each pan.  The larger pan held 7/8 apples, the smaller pan took 5/6 apples.  Whatever size pan you use, you will need to pack the apples together so that they fit together snuggly. Shoulder to Shoulder….

Tarte Tatin Recipe
8 Braeburn apples
1/2 packet puff pastry
2/3 tbsp caster sugar
50g unsalted butter
1/2 small orange, zest grated plus juice
1/2 lemon, zest grated plus juice
1/4 tsp vanilla extract

Core and peel all the apples and cut into half lengthways.

As we were using two different sized black iron pans – the smaller pan had 5 apples, so 10 halves and the larger pan had 7 apples or 14 halves.  The next stage was the caramelisation which can take about 10/15 mins.  We added some good knobs of butter into the apple filled pan and turned the heat to medium/high.  Then we added 2 or 3 tablespoons of sugar and allowed the apples to take on a lovely golden colour as they started to caramelize.  At this point we added a couple of teaspoons of the lemon/orange zest/juice mixture.   You may well need to add more butter as it gets absorbed.  You will need to hover over the pan with a fork and turn all the apples frequently making sure they get that all over golden tan.

Get your puff pastry and flour your surface well and roll each piece out to a rectangle of about 3mm depth and wide enough to cover your pan plus extra to fold under the apples. (Handy tip: I don’t wash my wooden rolling pin.  If you just scrape off whatever adheres to it with the back of the knife – it will last forever.

Laurent pointed out politely that working with pastry benefits from a cold smooth surface and a piece of granite in lieu of an expensive kitchen surface makeover.  (Note to myself check out my nearest reclamation yard!).

The next stage is a bit like tucking a blanket under the edges of a baby’s cot.  Carefully tuck the pastry underneath the apples making sure you go all round the pan leaving no gaps.  You may need to trim bits off here and there and use them to patch the gaps where there isn’t enough pastry to tuck underneath.


When you’re happy that your apples are cosily tucked up in their pastry blanket, lightly prick the pastry all over with a fork, being careful not to pierce through the pastry.  The tarte is now ready to go into a hot oven (at least 200 degrees C) and bake until the pastry is a light golden colour.  Approx 20 mins but definitely check it after 15 mins as temperatures do vary from oven to oven.

When your tart is cooked get it out of the oven with an oven glove, hold your pan firmly by its handle in one hand and get your serving plate as close as you can to the pan and with one swift manoeuvre invert the tarte onto your plate.  Re-arrange the apples if they have became dislodged in the inverting process.   Tarte Tatin is best eaten warm served with crème fraiche or vanilla ice cream.

If you’d like to learn how to make Tarte Tatin, White Chocolate Mousse or Pear and Hazelnut Tart, you can sign up today for one of my Art of Pudding classes starting again in September.  If you book for any of my classes before 31st August 2011, you can save £20 per person off the normal cost of a class (£70).  Cost: £50 per person!!!

Tarte Tatin Read More »